
 Drone Services
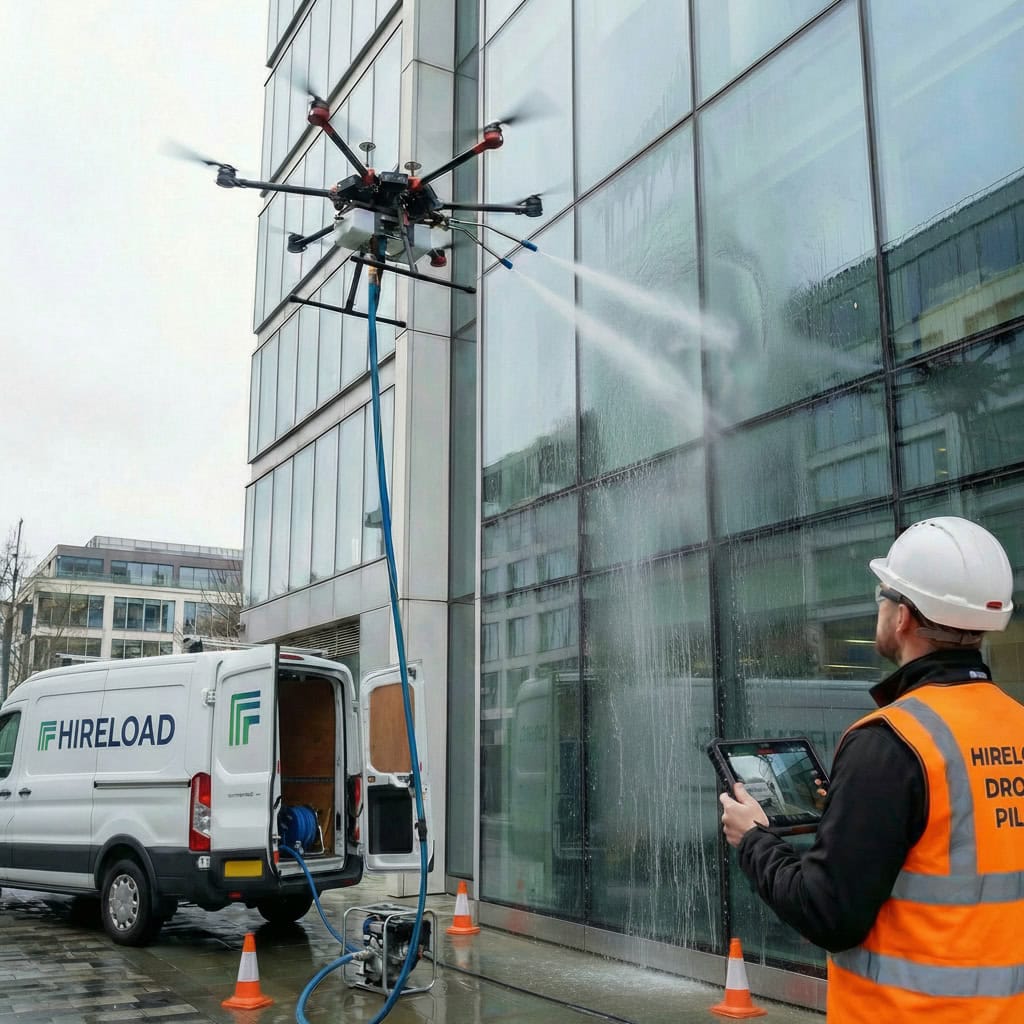
 Access Equipment
 Breaking & Drilling
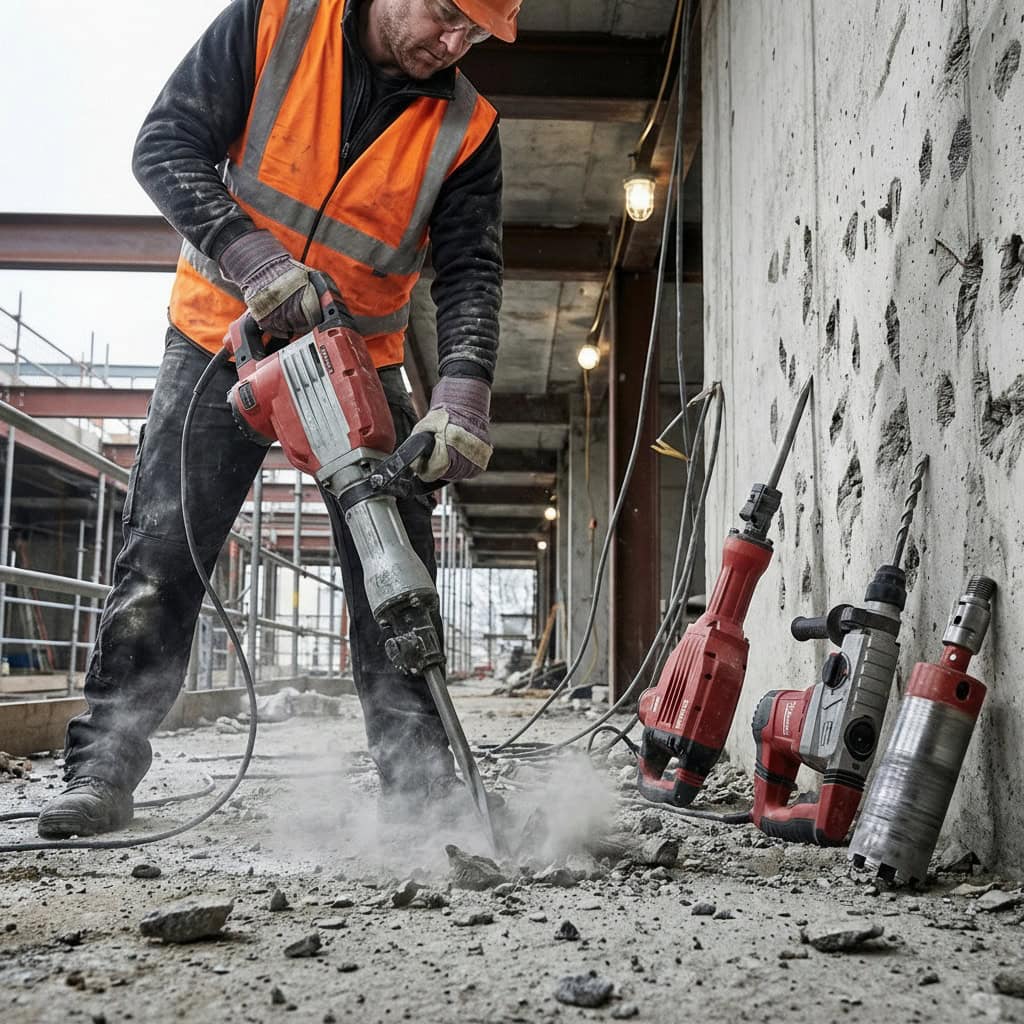
 Cleaning Equipment
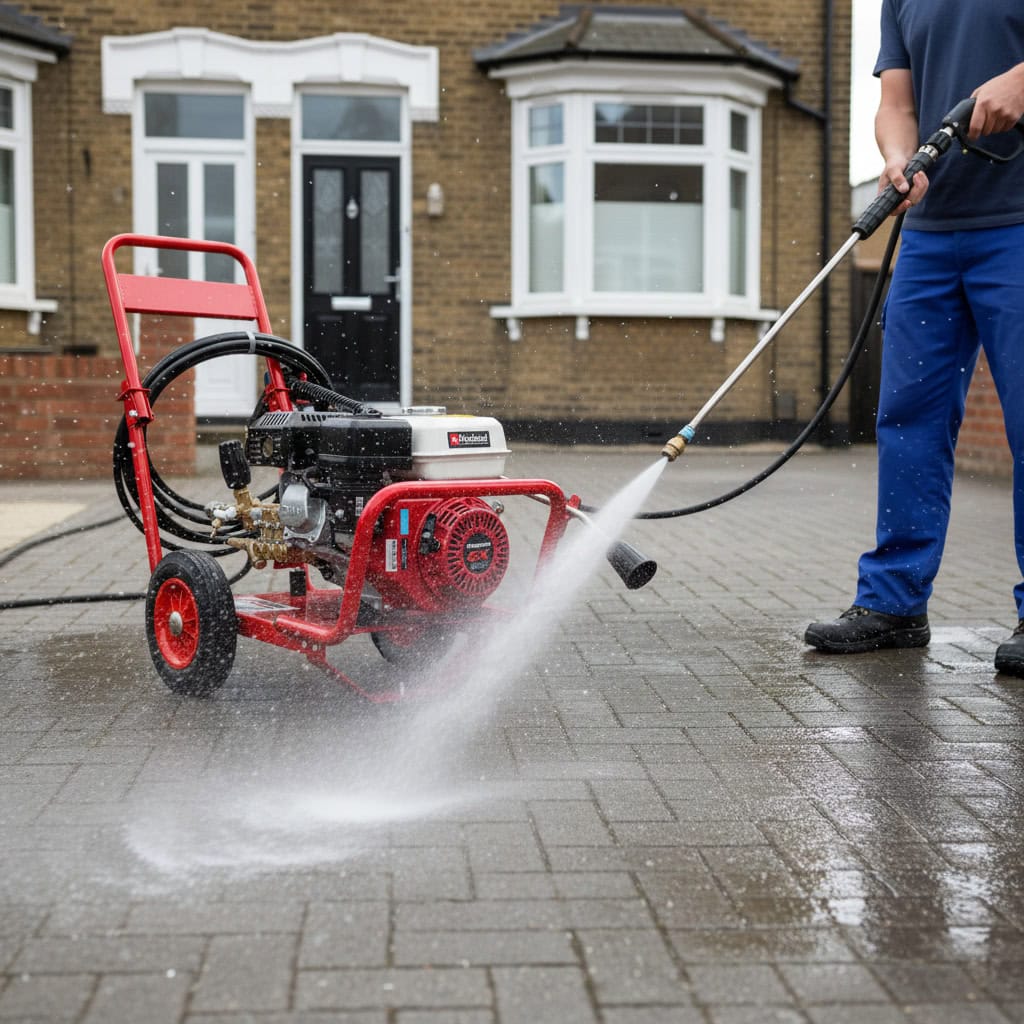
 Drying & Heating
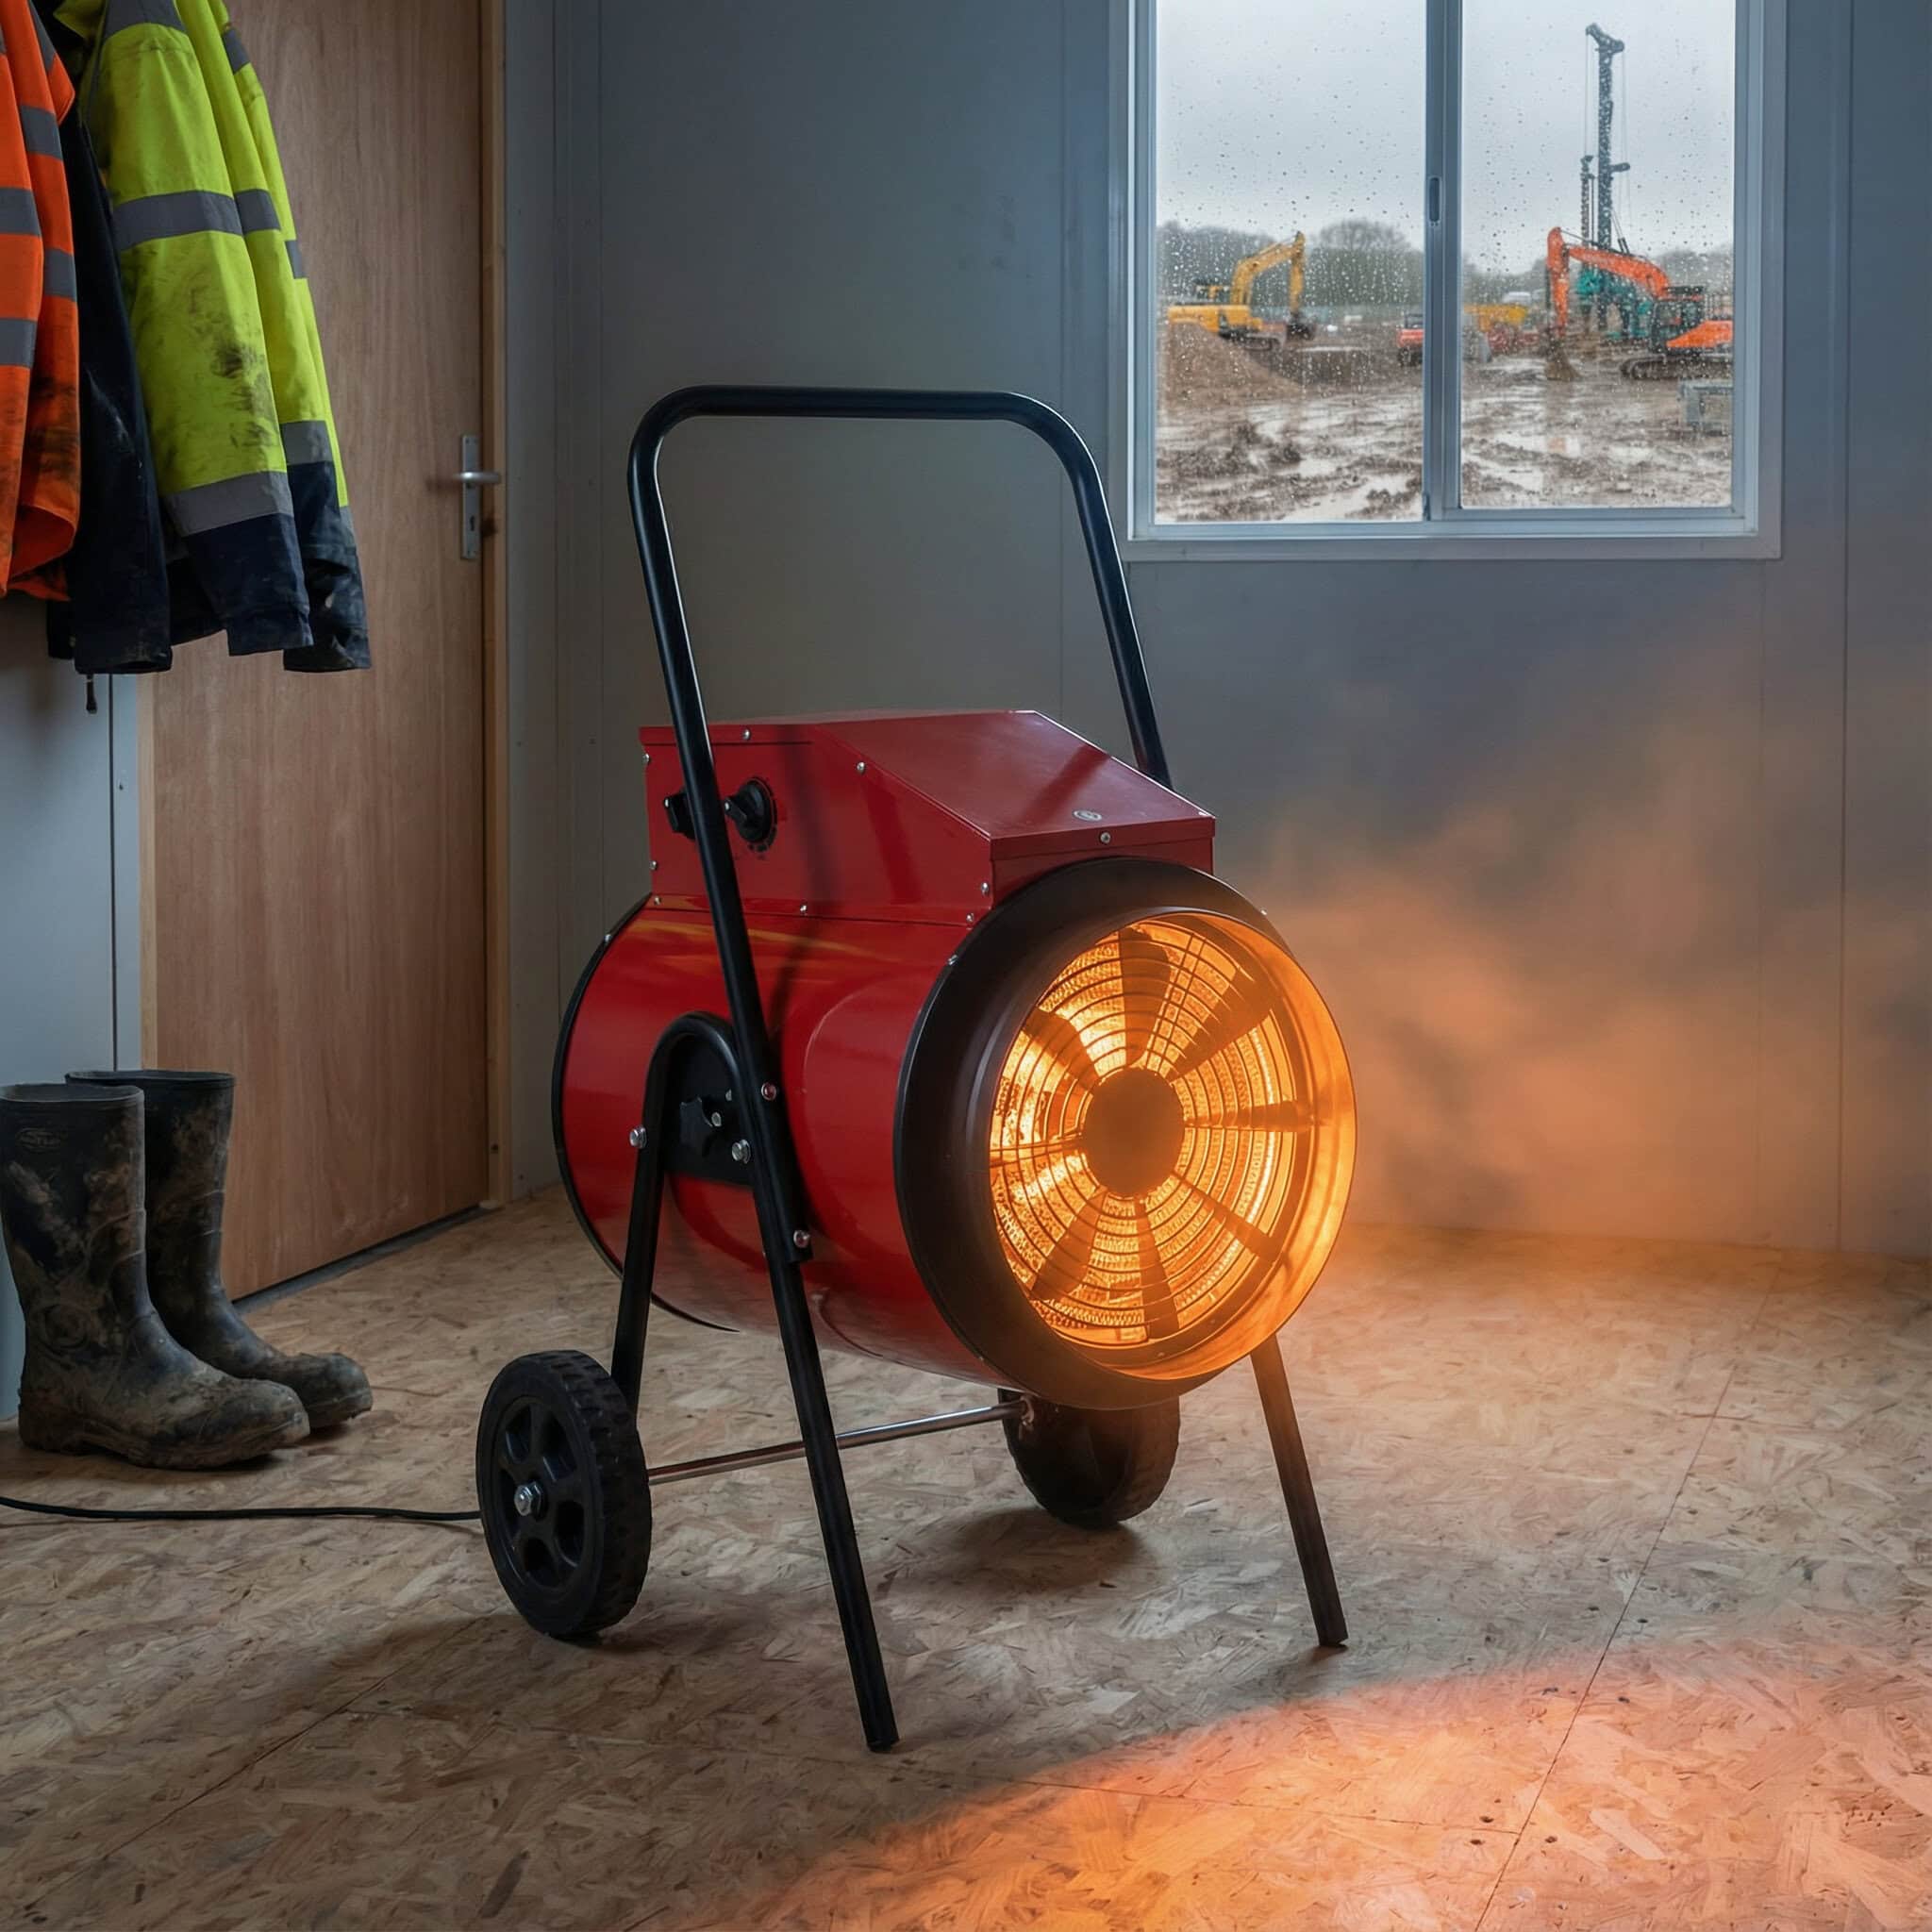
 General Site Tools
Equipment Hire Guides
Drying New Plaster: Should You Hire a Dehumidifier?
Drying New Plaster: Should You Hire a Dehumidifier? — A hired dehumidifier can cut plaster drying from weeks down to days, but only if you bring it in at the right time.
Hireload delivers equipment across London from our Greenford / UB6 operating area. View full London delivery areas.
Quick answer: Yes — a dehumidifier speeds up plaster drying significantly, but only if you use it at the right time. Let plaster cure naturally for the first 48 hours, then bring in the dehumidifier. Used too early it causes surface cracking; used correctly it cuts drying from weeks to days.
Why Plaster Takes So Long to Dry
Fresh plaster contains a lot of water. A single room of two-coat skim plaster can hold 10-20 litres of moisture that needs to evaporate before you can paint, wallpaper, or apply any finish.
In a well-ventilated room during summer, natural drying takes roughly 1-2 weeks for a single coat and 2-4 weeks for two coats. In winter, with windows closed and limited airflow, it can take 4-6 weeks — sometimes longer in poorly ventilated Victorian properties. That’s 4-6 weeks where the room is out of use, the renovation stalls, and every other trade is waiting.
The 48-Hour Rule
Fresh plaster needs an initial cure period where the chemical setting process takes place. During this phase (roughly the first 24-48 hours), the plaster is hydrating — the gypsum is reacting with water to form a solid surface.
Do not force-dry plaster in the first 48 hours. Blasting a freshly plastered wall with a dehumidifier or air mover dries the surface faster than the layers beneath it. The result is map cracking, powdery surfaces, and plaster that needs doing again.
What to do in the first 48 hours:
- Leave the plaster completely alone
- Keep the room at a stable temperature (15-20°C is fine)
- Don’t open all windows to “air it out” — this can cause uneven drying
- Don’t point fans or heaters at the walls
- Light ventilation is fine — a door left ajar, a window on the latch
After 48 Hours: Bring in the Dehumidifier
Once the plaster has set and the surface feels firm (not soft or tacky), you can safely introduce mechanical drying. This is where a hired dehumidifier earns its money.
Recommended setup:
- Position one commercial or industrial dehumidifier centrally in the room
- Do not point it directly at the wall — the dehumidifier extracts moisture from the air, not from the surface
- Keep the room closed — open windows fight the dehumidifier and slow everything down
- Maintain a room temperature of 18-22°C if possible (dehumidifiers work most efficiently in this range)
- Connect a continuous drain hose so the unit runs 24/7 without needing tank emptying
What to hire: For a single room, a 38L commercial dehumidifier is sufficient. For larger rooms, open-plan spaces, or multi-room plastering jobs, an industrial 63L unit or the 43L Dri-Eaz Cube provides faster extraction. Not sure how much extraction your space needs? Our guide on how many dehumidifiers you need breaks it down by room size.
Expected drying time with equipment: 4-7 days for most single-room skim plastering jobs after the initial cure, compared with 3-6 weeks without equipment.
Should You Use Air Movers for Plaster Drying?
Carefully, and not in the first few days. After the dehumidifier has been running for 48-72 hours and the plaster surface is visibly lighter and firm, you can introduce gentle air movement to speed things further. An air mover positioned to create general circulation — not blasting directly at the wall — helps distribute moisture evenly toward the dehumidifier.
If in doubt, skip the air movers and let the dehumidifier do the work alone. It’s slower but safer. Aggressive airflow on plaster that isn’t fully set causes more problems than it solves.
How to Tell When Plaster Is Dry Enough to Paint
Visual check: Wet plaster is dark brown/grey. Dry plaster is uniformly pale pink or white. If patches of darker colour remain, moisture is still present — keep the dehumidifier running.
Touch check: Dry plaster feels warm and uniform when you press your palm flat against it. Damp plaster feels noticeably cooler than the surrounding wall.
The test coat: Some decorators apply a mist coat (diluted emulsion) to one section. If it dries evenly, the plaster is ready. If it bubbles, streaks, or doesn’t adhere, there’s still moisture trapped underneath.
For certainty: A moisture meter gives you a number rather than a guess. Most plasterers consider anything below 5% moisture content safe to decorate. A £15-20 pin moisture meter from a DIY shop is a worthwhile way to confirm the job’s done.
Common Plastering Drying Mistakes
Cranking the heating to maximum. Extreme heat dries the surface too fast and causes cracking — the same problem as using a dehumidifier too early. Moderate warmth (18-22°C) is the sweet spot.
Opening all windows in winter. Cold, damp winter air introduces more moisture than it removes. A dehumidifier in a closed room is far more effective than relying on outside airflow in November.
Using a cheap domestic dehumidifier. A 10L unit from a retail shop is designed for background humidity control, not active drying. It won’t keep up with the volume of moisture in fresh plaster. A commercial 38L+ unit does the job in a fraction of the time.
Painting too early. If the plaster isn’t uniformly dry, paint traps moisture behind it — leading to peeling, bubbling, and eventually stripping it all off to start again. The extra day or two of dehumidifier hire is cheaper than redoing the decoration.
Frequently Asked Questions
Speed Up Your Plastering Job
Browse our dehumidifier range by capacity, or call 020 3375 4048 and we’ll help you match the right unit to your room size.
 Drone Survey & Mapping
 Drone Inspections