
 Drone Services
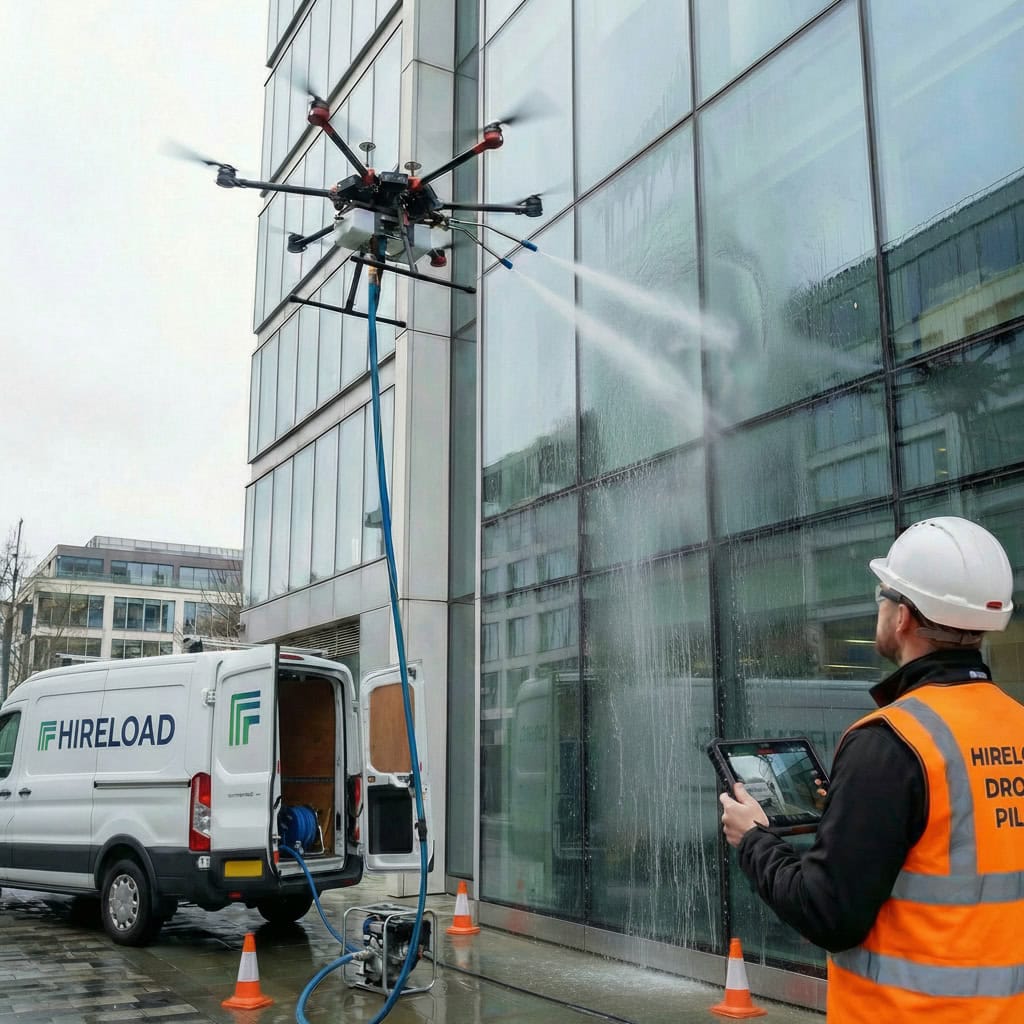
 Access Equipment
 Breaking & Drilling
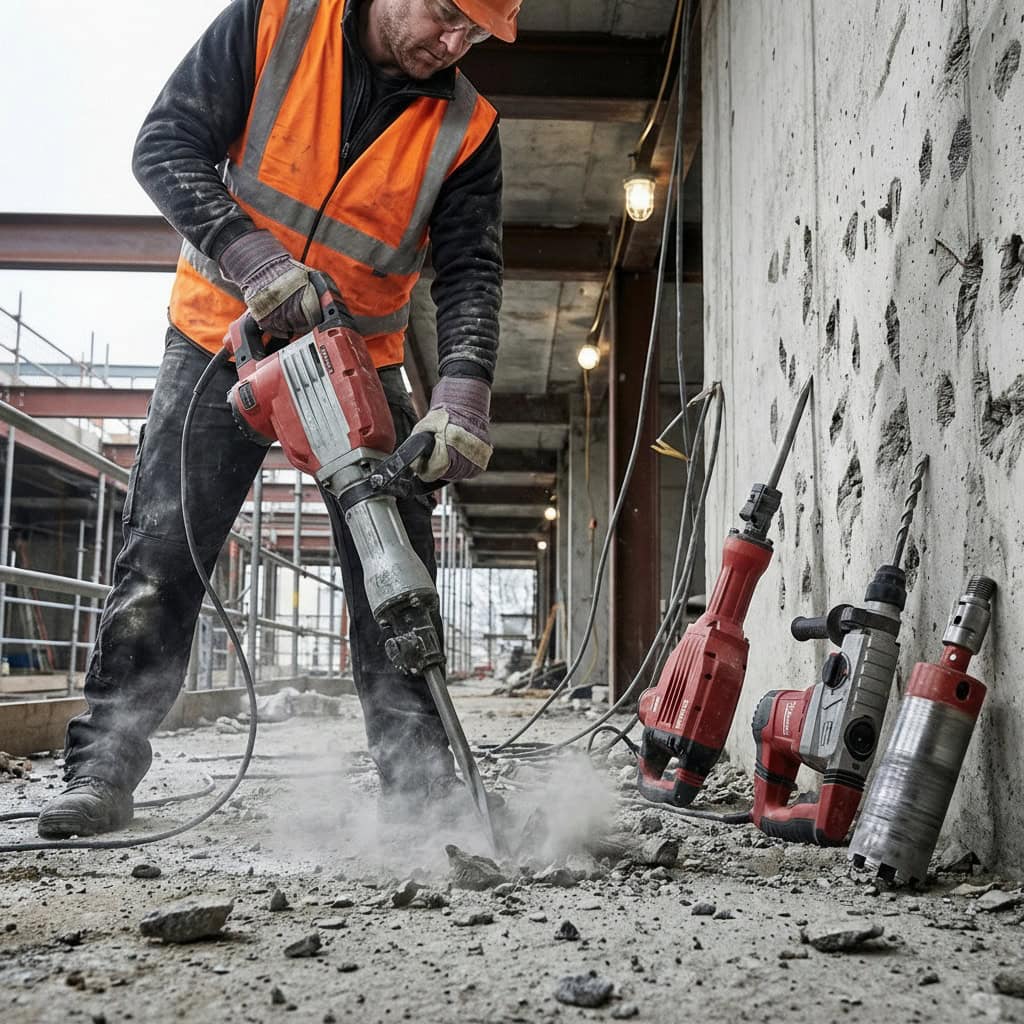
 Cleaning Equipment
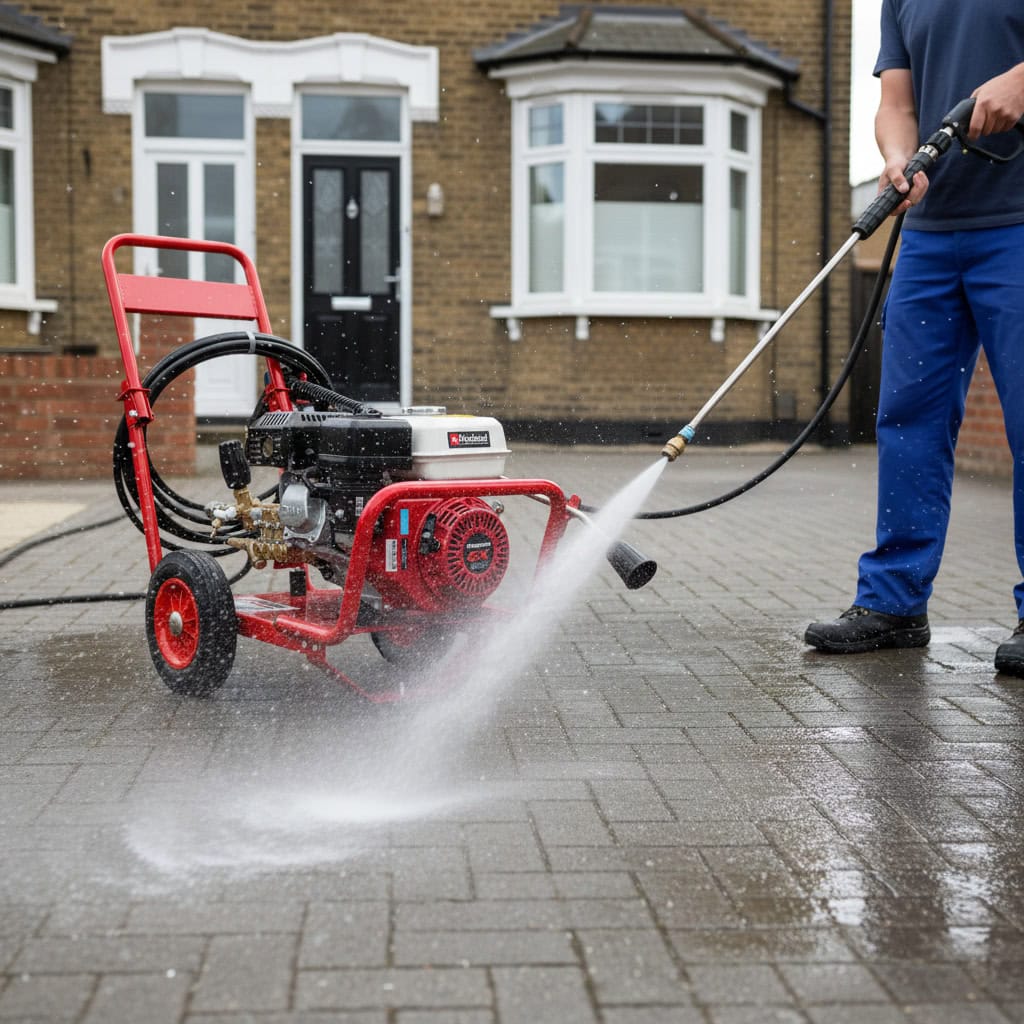
 Drying & Heating
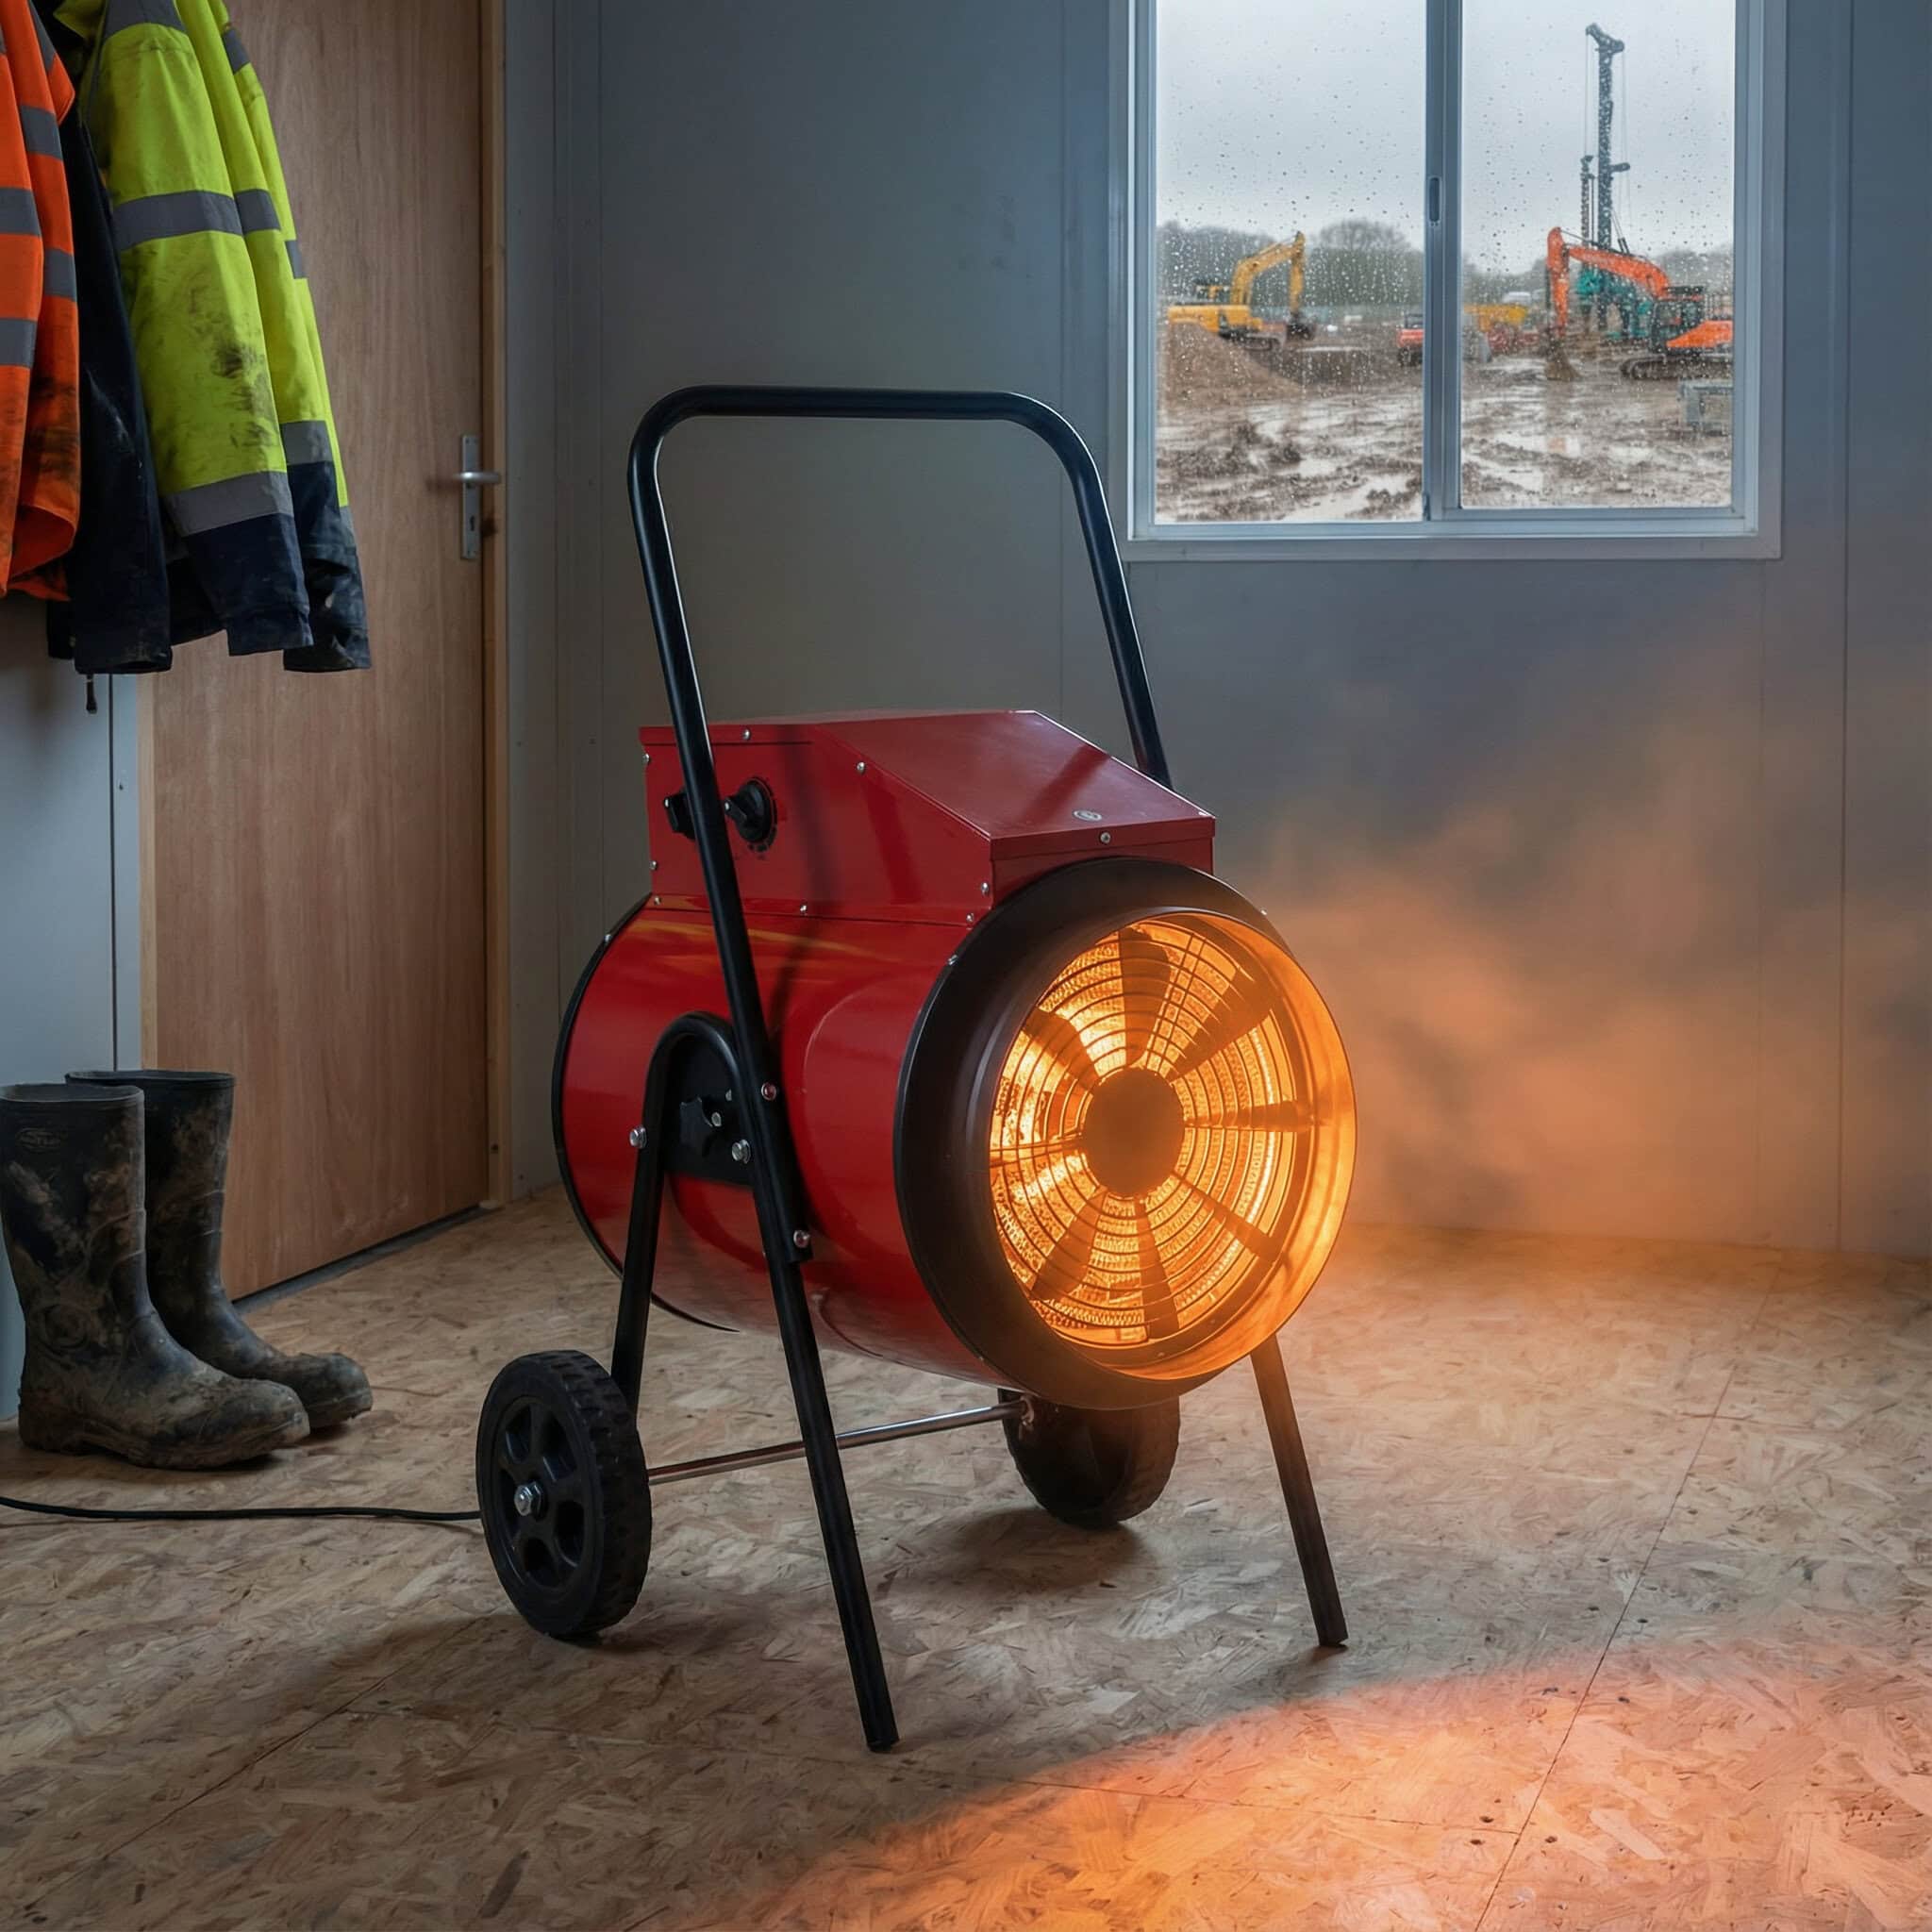
 General Site Tools
Equipment Hire Guides
How to Use a Floor Scrubber for the First Time — Setup, Technique & Common Mistakes

Before You Switch It On — Setup Checklist
The biggest mistake first-time users make is rushing to start scrubbing before the machine is properly set up. Ten minutes of preparation saves an hour of frustration.
Clear the floor first. Remove loose debris, packaging tape, cable ties, and anything that could jam the brush or block the squeegee. A quick sweep or vacuum pass before scrubbing makes a noticeable difference to the final result.
Check the squeegee blade. The rubber blade at the back is what collects dirty water. If it’s torn, folded, or sitting unevenly, dirty water gets left behind in streaks. Adjust until it sits flat and level across the full width.
Check the brush or pad. Make sure the correct brush type is fitted for your floor surface. Most hire machines come with a general-purpose brush — suitable for sealed concrete, vinyl, and tile. If you’re working on a softer surface, ask when you book.
Mixing and Loading Cleaning Solution
Most floor scrubbers use a clean water tank (solution goes in) and a recovery tank (dirty water comes out). Never mix these up.
Dilution matters. Floor cleaning solution is concentrated. The correct ratio is usually printed on the bottle — typically somewhere between 1:20 and 1:50 depending on the brand and how dirty the floor is. More solution does not mean cleaner floors. Overdosing creates a sticky residue that attracts dirt faster than a clean floor would.
Fill the clean tank with warm water first, then add solution. This prevents foaming. Cold water works but warm water (not hot) dissolves grease more effectively, particularly on kitchen or workshop floors.
The Actual Scrubbing Technique
This is simpler than most people expect. The machine does most of the work — your job is to walk at the right speed and keep straight lines.
Walking speed: Slightly slower than a comfortable walk. If you rush, the brush doesn’t have enough contact time to break up dirt, and the squeegee can’t collect all the water. If the floor behind you looks wet and streaky, you’re going too fast.
Overlap each pass by about 10cm. This prevents the visible tramline gaps that first-time users get. Think of it like mowing a lawn — each strip should just overlap the last.
Work in straight lines, not circles. The squeegee at the back only works properly when the machine moves in a straight path. Circular or zigzag patterns leave dirty water in unpredictable places.
Edges and corners: Most walk-behind scrubbers can’t reach the last 5-10cm against walls and skirting. Accept this and do edges with a mop afterward, or use a machine with a side brush if the hire range includes one.
What to Do When You’re Finished
The cleanup matters as much as the scrubbing. Skip this and you’ll return a machine that smells, performs worse next time, or costs you a cleaning charge.
Empty the recovery tank immediately. Dirty water sitting in the tank for hours starts to smell and can stain the tank interior. Tip it into a drain, not onto the floor you just cleaned.
Rinse both tanks with clean water. A quick rinse of the clean tank and recovery tank removes detergent buildup.
Remove and rinse the squeegee blade. Wipe it clean and refit. Dirt trapped under the blade is the number one cause of streaks on the next use.
Leave the recovery tank lid open to air-dry. A closed, damp tank breeds bacteria and mould within 24 hours.
Common First-Time Mistakes
Going too fast. The most common problem. If the floor doesn’t look clean in one pass, slow down before adding more solution or more pressure. Speed is almost always the issue.
Using too much cleaning solution. Excess detergent doesn’t get fully rinsed by the squeegee, leaving a film that makes the floor slippery and attracts dirt within days. Follow the dilution ratio on the bottle.
Scrubbing a floor that hasn’t been swept. Loose grit and debris scratch the floor surface and clog the squeegee. Always sweep or vacuum first.
Ignoring the squeegee. If the rubber blade is worn, bent, or dirty, the machine can’t pick up water properly. Checking the squeegee takes 30 seconds and fixes 80% of poor results.
Not overlapping passes. Leaving 2-3cm gaps between strips creates visible dirty lines. Overlap by 10cm — slightly more is better than slightly less.
Which Floor Scrubber Do I Need?
| Floor Type | Best Machine | Key Setting | Watch Out For |
|---|---|---|---|
| Sealed concrete (warehouse) | Rotary floor scrubber | Medium brush pressure, standard solution | Expansion joints — squeegee bumps over them |
| Vinyl / linoleum (office, shop) | Rotary floor scrubber | Light brush pressure, mild solution | Too much pressure scratches soft vinyl |
| Tile (kitchen, bathroom) | Rotary floor scrubber | Medium pressure, degreasing solution | Grout lines hold dirt — may need a second pass |
| Carpet | Carpet cleaner (not a scrubber) | Hot water extraction | Never use a floor scrubber on carpet |
| Unfinished wood | DO NOT use a floor scrubber | — | Water damages unsealed wood |
Can I use a floor scrubber on any floor?
How long does it take to scrub a floor?
Do I need to buy cleaning solution separately?
What if I scratch the floor?
Is a floor scrubber the same as a floor buffer?
Related guides: Floor scrubber vs mop | Walk-behind vs ride-on | Floor scrubber hire costs | Warehouse floor cleaning
 Drone Survey & Mapping
 Drone Inspections